Print Tests
Will the Print Hold Up? Tape, Rub and Page-Count Checks for Printed Products
Printing defects rarely show at a glance. A cover looks perfect in the factory and arrives with the logo flaking at the edges, ink rubbed onto the shelf, or a notebook that is two sheets short. Most of these problems can be caught on site in a few minutes, with tape, a cloth and some alcohol, if the inspector knows what to test and the buyer has said what a pass looks like. This guide follows one of our inspectors through the three checks we run on printed notebooks, and explains how to set the same checks for packaging, stationery, labels and other printed goods.
- The tape test for ink adhesion, and the cross-cut version for coatings
- The alcohol rub and damp-cloth rub tests for rub resistance
- Page count and print quality checks
- Sample sizes, defect classes and what to write in your checklist
The photos come from an inspection of printed notebooks. You can watch the three tests in full, unedited, in our video Will the Print Hold Up? 3 On-Site Tests for Printed Notebooks.
Why Printing Fails After Shipment
Ink that lifts or rubs off is almost always a process problem, not bad luck. The usual causes:
- Ink not fully dried or cured. Covers stacked and packed too soon after printing, or UV ink and varnish under-cured to keep the line fast.
- Ink that does not suit the surface. Plastics such as PP and PE need surface treatment before printing; laminated or coated paper needs a compatible ink. Without it the print sits on top instead of bonding.
- Varnish or lamination problems. A protective layer that is missing, too thin or not bonded leaves the print exposed to friction.
- Foil stamping and spot effects applied with too little heat or pressure.
- Storage and transport. Humidity, heat and cartons rubbing against each other in a container finish what the factory started.
None of these shows on a visual check of a fresh product. They show when the print is stressed, which is what the following tests do.
Test 1: Tape Test for Ink Adhesion
The tape test answers one question: is the ink bonded to the surface, or only resting on it? The inspector presses a strip of pressure-sensitive tape firmly over the printed area, waits briefly, then pulls it off in one quick movement and looks at both the tape and the print.
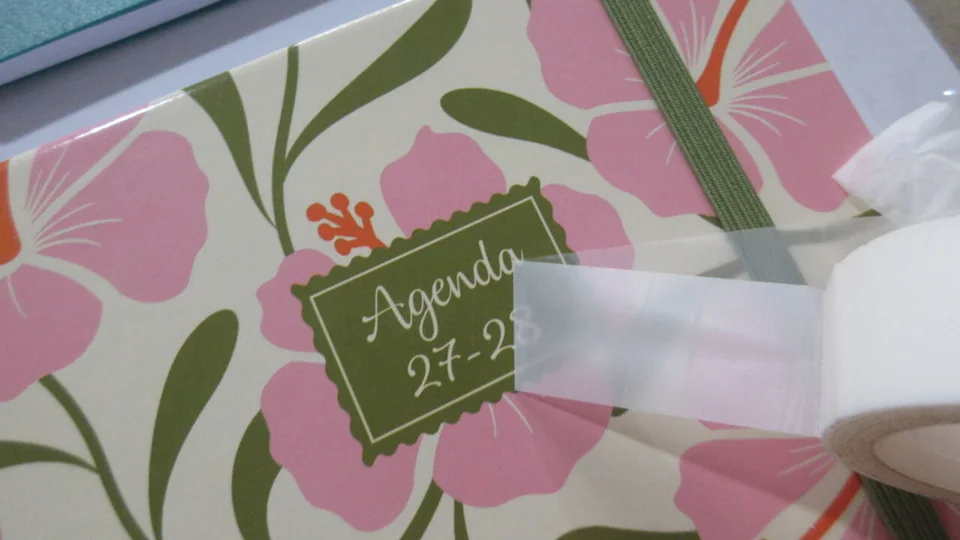
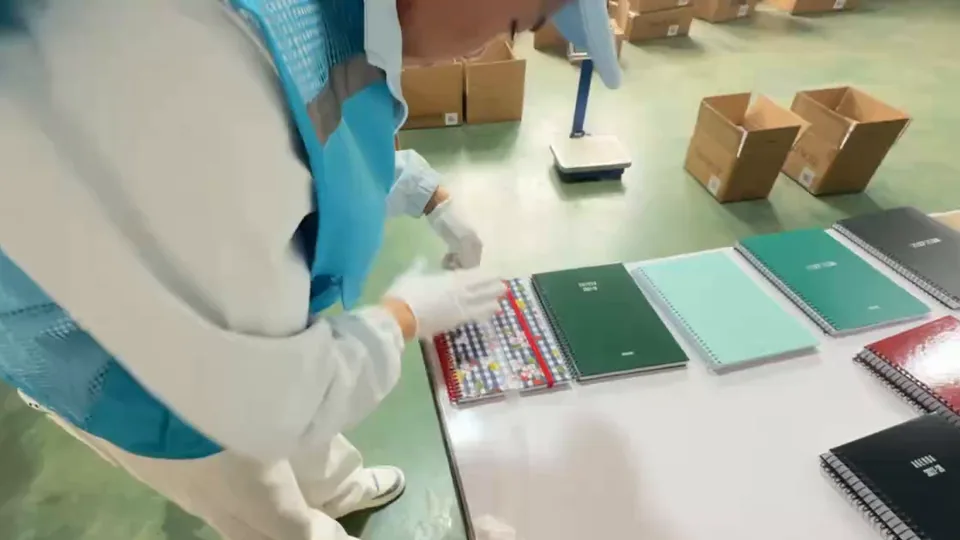
How we run it when the buyer has no method of their own:
- Tape: transparent pressure-sensitive tape about 25 mm wide, such as 3M 610 or an equivalent. ASTM F2252, the practice for ink adhesion on flexible packaging, notes that 3M 610 is commonly used; the tape itself is agreed between buyer and supplier. Office tape varies too much to compare results.
- Where: on solid colour areas, small text and the edge of the print, where adhesion fails first. On products with several print methods (offset, screen, foil, UV varnish), each one is tested.
- How: press the tape down with a fingertip or eraser until no air is left, wait about 60 to 90 seconds, then pull it back on itself at close to 180° in one fast, even movement.
- Repeat: on a second spot of the same piece. One clean pull can be luck.
- Pass: no ink or coating on the tape and no lifted areas on the print. Isolated specks only at a cut edge are usually recorded as minor; any loss in text, a logo or a solid area is a major defect.
Cross-cut tape test for coatings. On painted or coated hard surfaces, such as metal, rigid plastic or glass, a simple tape pull is often too easy to pass. The stricter version first cuts a lattice through the coating with a multi-blade cutter, then applies and pulls the tape, and grades the amount of coating removed. The two common methods are ASTM D3359 (Method B, the cross-cut, for coatings up to 125 µm; Method A, an X-cut, for thicker coatings) and ISO 2409, which sets the cut spacing by coating thickness and substrate: 1 mm, 2 mm or 3 mm.
| Area removed | ASTM D3359 | ISO 2409 |
|---|---|---|
| None; cut edges smooth | 5B | 0 |
| Less than 5% | 4B | 1 |
| 5% – 15% | 3B | 2 |
| 15% – 35% | 2B | 3 |
| 35% – 65% | 1B | 4 |
| More than 65% | 0B | 5 |
Many buyers require 4B or better (ISO class 0 or 1) on consumer products. Whatever you choose, write the class in your checklist; “good adhesion” cannot be judged on site.
Test 2: Alcohol Rub for Rub Resistance
A notebook cover is handled every day; packaging is wiped, scanned and stacked; household products are cleaned with sprays that contain alcohol. The alcohol rub test simulates all of that in less than a minute.
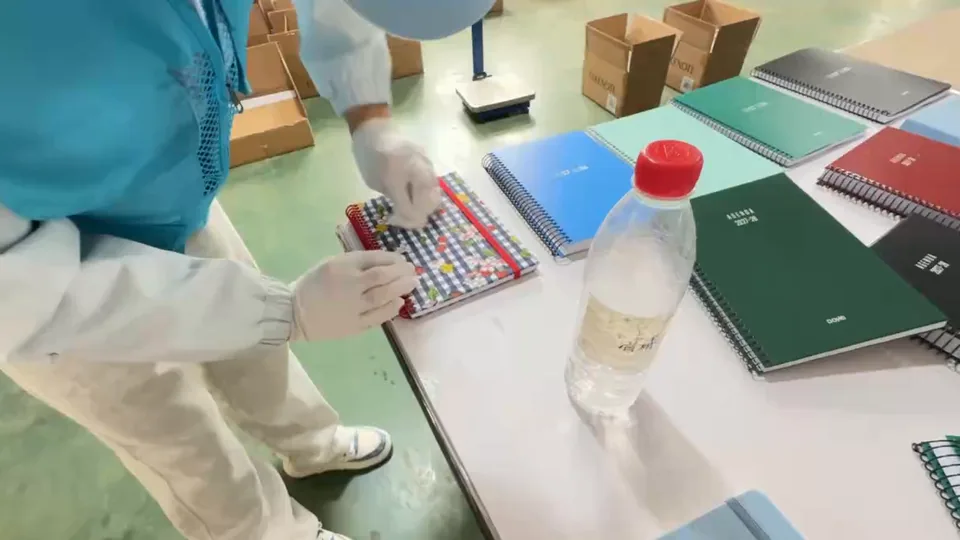

There is no single industry standard for an on-site alcohol rub: brands set their own concentration, load and number of strokes. When the buyer has no method, a common setup, and the one in our video, is:
- Cloth: clean white cotton cloth, so that any colour transfer is visible.
- Alcohol: 75% ethanol is the most common on site; some brands specify 95% to 99% isopropyl alcohol, which is harsher. Write the type and concentration down, because results differ.
- Strokes: the moistened cloth is rubbed back and forth over the print 20 times with firm, even hand pressure. Stricter programmes use 50 strokes or a fixed weight.
- Pass: the print does not fade, smear or come off, and no colour transfers to the white cloth. Visible fading or colour on the cloth is a major defect.
Damp-cloth and dry rub. For products that will never meet alcohol, a rub with a cloth dampened with water is the usual check, and many of our reports list it as “rub the printed area with a damp cloth and inspect for smudging, peeling or fading”. A dry rub with a clean cloth catches print that has not dried. Laboratory methods exist for buyers who need a measured result: ASTM D5264 tests the abrasion resistance of printed materials on a Sutherland rub tester, and ASTM D5402 assesses the solvent resistance of coatings with solvent rubs. These are not run on a factory floor.
Test 3: Page Count and Print Quality
A notebook sold as 80 sheets should have 80 sheets. Two missing sheets cannot be seen from the outside, and on a large order they add up to real money, or to a complaint from a retailer who counts. The inspector counts the sheets of a sample of notebooks and checks the inside print at the same time.
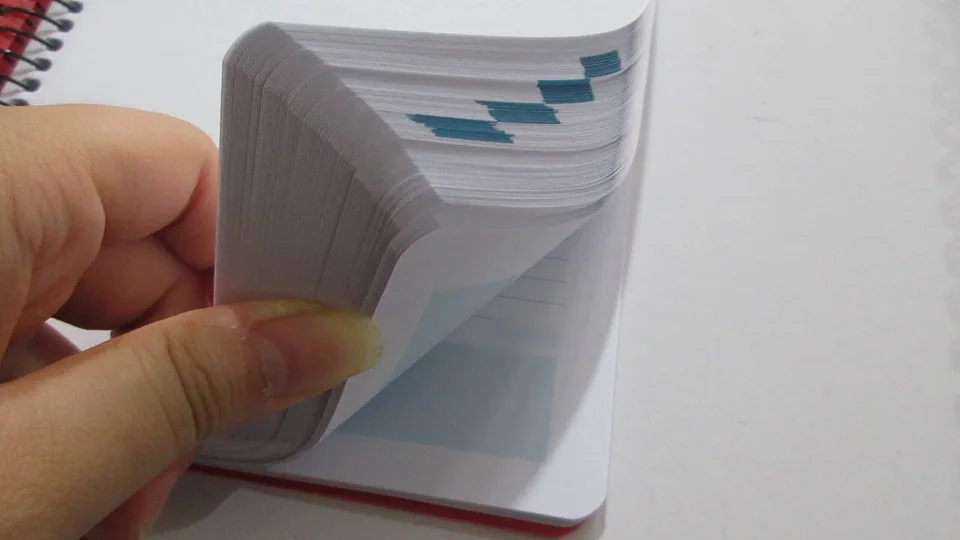
- Count sheets, not pages. 80 sheets are 160 pages. Make sure the specification and the inspector use the same unit.
- Weigh as a cross-check. Weighing each sampled notebook against a counted reference piece quickly finds units with missing sheets in a larger sample.
- Inside print: ruling lines straight and aligned with the edge, no missing or doubled pages, no smudges, ink set-off or blank pages.
- Binding: spirals closed so they do not catch, perforations that tear cleanly, glued spines that hold when the notebook is opened flat.
- Cover print: colour against the approved sample, registration (colours lined up), sharp small text and barcodes that scan.
- Pass: sheet count as specified, with no tolerance unless agreed. A short count is a major defect.
Sample Sizes for Print Tests
Visual print defects, such as smudges, misregistration and colour, are counted in the normal workmanship sample, usually general inspection level II. The tape and rub tests mark or damage the piece and take time, so they are run on a smaller sample drawn with a special inspection level, typically S-3 or S-4. In one of our reports on 4,000 pieces, the tape test and the rub test were each run on 32 pieces at level S-4, with AQL 0 / 0.65 / 1.5, which allows no critical defect, no major defect and one minor defect. Page counts are often done on the same smaller sample, with weighing used for the rest. How special levels and AQL work is explained in our article on ANSI/ASQ Z1.4 vs ISO 2859-1.
Classifying Print Defects
| Class | Examples |
|---|---|
| Critical | Missing or wrong safety warning, age grading or legal marking; wrong product or wrong language version printed |
| Major | Ink lifts in the tape test; print fades or transfers in the rub test; logo or text misprinted or illegible; colour clearly different from the approved sample; barcode does not scan; sheet count short |
| Minor | Small speck or spot not visible at arm's length; slight misregistration; light scuff on a non-display surface; specks lifted only at a cut edge |
How to build a full list for your product is covered in critical, major and minor defects.
Put It in Your Checklist
Most arguments about print tests are about method, not results: the factory says “we tested it”, the inspector used a stronger tape. Agree these points before the inspection:
- Tape: brand and type, width, dwell time, peel angle, and how many spots per piece
- Cross-cut, if needed: standard, cut spacing and the minimum class that passes
- Rub test: water, ethanol or isopropyl alcohol and its concentration, cloth, number of strokes and pressure
- Sheet or page count and any tolerance; reference weight if weighing is used
- Colour standard: approved sample, Pantone reference or golden sample
- Inspection level and AQL for the tests and for visual defects
- Photos or a short video of each test in the report
Our guide to preparing an inspection checklist shows how to lay this out, and on-site tests during inspection covers tests for other product types.
Carton marks, barcodes and labels have their own checks; see packaging, labelling and carton mark inspection.
What On-Site Tests Cannot Replace
A tape test and a rub test show whether the print is bonded and durable on the day of the inspection. They do not show what is in the ink. Heavy metals in children's products, ink migration on food-contact items and chemical limits under rules such as California Proposition 65 need a laboratory test on a sample sent from the factory. See Prop 65 and RoHS: inspection versus lab testing and kitchenware and food-contact inspection.
Sources
- ASTM D3359-23 — Standard test methods for rating adhesion by tape test
- ISO 2409:2020 — Paints and varnishes, cross-cut test
- ASTM F2252/F2252M — Practice for evaluating ink or coating adhesion to flexible packaging materials using tape
- ASTM D5264 — Abrasion resistance of printed materials by the Sutherland rub tester
- ASTM D5402 — Assessing the solvent resistance of organic coatings using solvent rubs
Standards change. Check the current edition before writing it into a contract.
Add print tests to your next inspection
Write the tape, rub and page-count requirements under special requirements when you book, or upload your checklist afterwards.
Book an inspection